How To Setup A WordPress Development Environment?
Are you working on WordPress development frequently? Are you tired of the many hours you spend on the website and testing out the feature? If this is the case, you must be aware of the WordPress development environment. This is a safe house where you can play with themes and plugins, make changes, test them and update websites.
All the changes are done in the Development or safe environment. Once you have tweaked the changes, upped your website and finalized on a theme, you can shift the entire website to live hosting. This will make it available to the general public and the visitors coming to the website will be able to access it.
The biggest advantage you get with it is that you can make changes, introduce new features and plugins without anyone seeing it live before you release it. Once it is done, push it out to the public.
In this article, we will talk about what the WordPress development environment is and how you can set it up easily and efficiently.
What Is A Development Environment For WordPress?

When we specifically talk about the WordPress development environment, it is a set of tools that help you safely test the changes you want to make to your website before you make it live. This is important because you can’t take down the website, again and again, to check if the changes you made or good enough or not.
Not only will it be time-consuming and frustrating, but it will also be a big hassle for the users if the website is down for maintenance and updating most of the time. A WordPress development environment provides the following advantages to the developers.

Undoubtedly, these are not the only advantages the development environment has. There are many more. Now that we are clear how important a WordPress development environment is for developers to work efficiently and effectively, we will see how you can set it up in no time.
5 Steps to Setup a WordPress Development Environment
1. Select A Server
Probably one of the most difficult decisions you might have to make is to select the server. Of course, you can’t go on a shared server. You require a dedicated server for this. When it comes to dedicated servers, you have two options: local or virtual server.

Both the local server and the virtual ones have their advantages and disadvantages. A local server is comparatively easier to install. Accessing it is much easier too. But, the setup can take a lot of time and effort if there is no guide.
Worse come worse: you can also end up with a solution that is not even compatible or specific to WordPress. You should go for options like WampServer, MAMP and XAMPP.
In the case of virtual servers, they can also be a little tough to set up if you have not worked with them before. But that is the only drawback. The good thing about it is that you can make as many virtual servers on your computer as much as you want. No compatibility issue will arise.
The local servers make deleting the files complicated. Deleting a server can take up a long time and can be tiresome. Deleting a virtual server is no problem. It can be wiped clean in no time. New technologies are emerging day by day. One such technology is a cross between the local and virtual server. Local by Flywheel and Desktop Server are two such examples. These allow the creation of unlimited WordPress websites, deleting the sites and customizing the server of your choice. It is a perfect blend of local and virtual setups and is the best option you can go for in our opinion.
2. Pick a Text Editor Or Integrated Development Environment (IDE)
The polished and experienced developers already have a favorite text editor. They have already been working with them and know which one is the best. Going for the best will increase the efficiency of your work.
The functioning of a text editor is quite simple. All it does is edit plain text. It works with different programming languages and makes your work easier by offering automation.
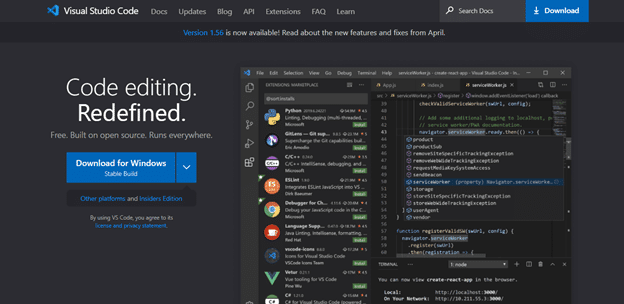
If you search online for text editors, you will come across a plethora of options available. As we said earlier, everyone has a favorite and we will not do down that lane. For us, Visual Studio Code is the best one. The reason for this is the auto-completion option along with the various packages available.

On the other hand, if you want something more advanced and don’t want to be restricted with a text editor, you can go for an IDE (Integrated Development Environment). This is more advanced as compared to the text editor. An IDE combines the features of a text editor with other project management and development tools.
When compared, we can’t say that an IDE is better than the text editor. What we can say is that it is more efficient. For WordPress, our top pick is NetBeans.
3. Choose Your Browser
With the advance in technology, browsers are offering more functionality. When it comes to developer tools, modern browsers have them. This is why picking the right browser with the right development tools will make your WordPress website experience better.
The advantage of these tools is that the browser itself will enable and help you to debug the websites and also test the changes all without even exiting the browser. Each browser comes with its own set of development tools. The Firefox Developer Edition was even better than the Chrome one and we recommend it for you.

At the end of the day, you are going to be doing all the testing. Hence, it is important to choose one which you as a developer are comfortable with working with. After doing excessive research, we find Firefox to be the best one. Edge, Opera and Safari are also good option to go for.
4. WordPress Debugging
At this point, you are done with the server setup, IDE/text editor and development tools. If you don’t have a WordPress site, this is the time to install it. The debugging function is important to enabling at this time.
Many people ask why the debugging feature is so important. It comes up with a list of generated errors. As far as development is concerned, it is going to act as a lifesaver. This will allow you to catch the errors beforehand. Also, you will be saved from so much hassle as you won’t need to make changes to an already established website.
5. Install WordPress Tools
Technically, this is the last stage of setting up your WordPress development environment.
- WordPress development tools – check.
- A way for catching bugs – check.
All set to get down to work, right? Let us tell you a little secret. It is never enough when it comes to development. You can add more WordPress tools if you want for a better and efficient experience.
Who doesn’t want to have a more streamlined development process? Go ahead and install the WordPress Command Line that has super easy commands that you can learn by heart in no time. Query Monitor also allows you to install tools in a bundle form for quick and easy access. This is an excellent tool for debugging the hooks, HTTP requests and even database queries.
For theme developers, Theme Check is a good plugin that checks your theme against all the WordPress standards. This is a big help if you don’t want to spend hours checking and re-checking. Bingo! You are done with developing your WordPress Development Environment and ensuring that it will be bug-free.
Bonus Tip
After you are done with establishing the environment, what are you going to do next? Well, today is your lucky day as we are going to tell you how to go about it further.
It is never advisable to go ahead and make changes directly to the website when it is live. There is so much that can go wrong. It is important to duplicate it and make a carbon copy or clone of the website with the help of a Duplicator.
Different plugins allow you to make a copy and set it in the testing environment. Now, testing the changes is going to be easy and safe. No one will see the changes before you want them to.
Conclusion
Are you new to the WordPress environment? Our guide will help you in establishing a WordPress development environment. Not only this, but we have also given our recommendations as to which tool will be best for which function.
Remember, the internet is full of many different options and everyone has a different experience with different tools. Undoubtedly, setting a dedicated WordPress environment is going to take time. This is the reason why most people are reluctant to do it.
But, trust us, it is going to do you so much good. With our 5-step process, things are going to be so much easier.
Share this post:

Web Development Agency
In the times of today, it is nearly impossible to even imagine that a company or business can survive and compete without an online presence in the market.

How to Become a Successful Full Stack Developer
The development of a software application can be broken down into 2 parts. The two areas of expertise are known as front-end and back-end development.

Top 10 Plugins to Help with WordPress Security
Security is one of the main concerns of any platform these days. As information is getting more and more digital, data is becoming more precious than anything.
Connect with us to find out what true value added services are.
contact@sourceone.io
Headquarters – Ho Chi Minh city, Vietnam
(+84) 353 197 427
Brand – Sydney, Australia
(+61) 401 713 724
About SourceOne
Privacy
Terms of Use
Mobile application
Website and API Services
UI/UX Design
Next – Gen Technology
NEWSLETTER
Join us for get latest updates


